
DIY - Pendulum Clock
A pendulum clock is a clock that uses a pendulum, a swinging weight, as its timekeeping element. The advantage of a pendulum for timekeeping is that it is a harmonic oscillator: it swings back and forth in a precise time interval dependent on its length, and resists swinging at other rates. From its invention in 1656 by Christiaan Huygens until the 1930s, the pendulum clock was the world's most precise timekeeper, accounting for its widespread use.
Hardware Requirement
---------------------------------

For this project we need:
Pallet Wood
Protective equipment like:
Face mask
Glasses
Gloves
Sanding Tool
Hammer
Measuring Tape
Nails
Handsaw or Chop-saw
Knife
Pliers
Pencil
and Paint of your choice
Electronic Components
---------------------------------

For the electronics bit we need:
1 x Arduino Nano
1 x Servo Motor
1 x 18650 Battery or a 5v DC Buck Step-Down Module
1 x Battery Protection Board
1 x SPDT Switch
1 x Generic PCB
Connecting Cables
and General Soldering Equipments
Wood Working
---------------------

Lets start the project by sanding the planks to give them a nice and smooth texture.

Next using a chop-saw, I am cutting the two sides, bottom and the top sections of the clock.

Once all the sides are ready its time for me to join them all together. At first I just used nails but soon I realized that it was not a good idea to have just nails to hold the sides. So, I went ahead and added screws to give the sides an additional support.
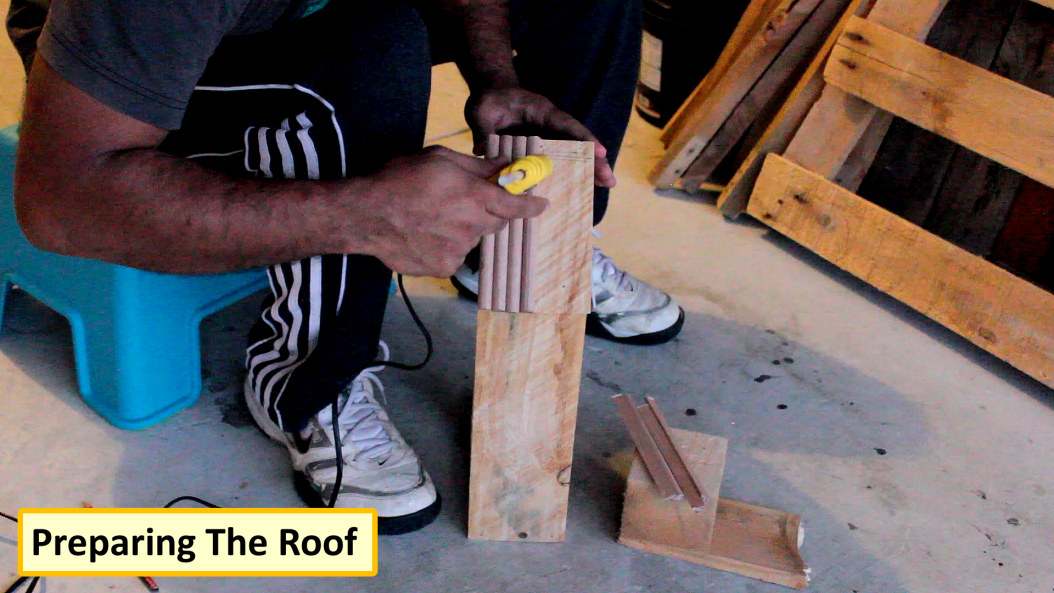
Using an edge decorative stick I am preparing the roof of the clock.


And using some of the leftover wooden blocks from my last project, I am preparing the base of the clock.

To fill in the gaps, I am adding a bit of PoP to the groves. However, as we all know two dis-similar materials like wood and plaster expand and contract at different rates. For any sort of permanence you need to isolate the movement of each relative to the other. This problem is commonly encountered when you paint the siding on a house. However, this clock is not going to move a lot and will not be placed outside the house so adding a bit of PoP would not really matter as long as I seal it properly.
Preparing the Dial
--------------------------


I am preparing the dial of the clock using a board extracted from a broken chest's drawer.

My plan is to have a dark colored dial and a light colored housing for it. So, I am painting the dial black.


Once all the numbers are transferred I am painting the graphite impressions with white color.


Designing the Pendulum
-----------------------------------
 Now, from the same compress wood board I am extracting another circle which will be used for the pendulum of the clock.
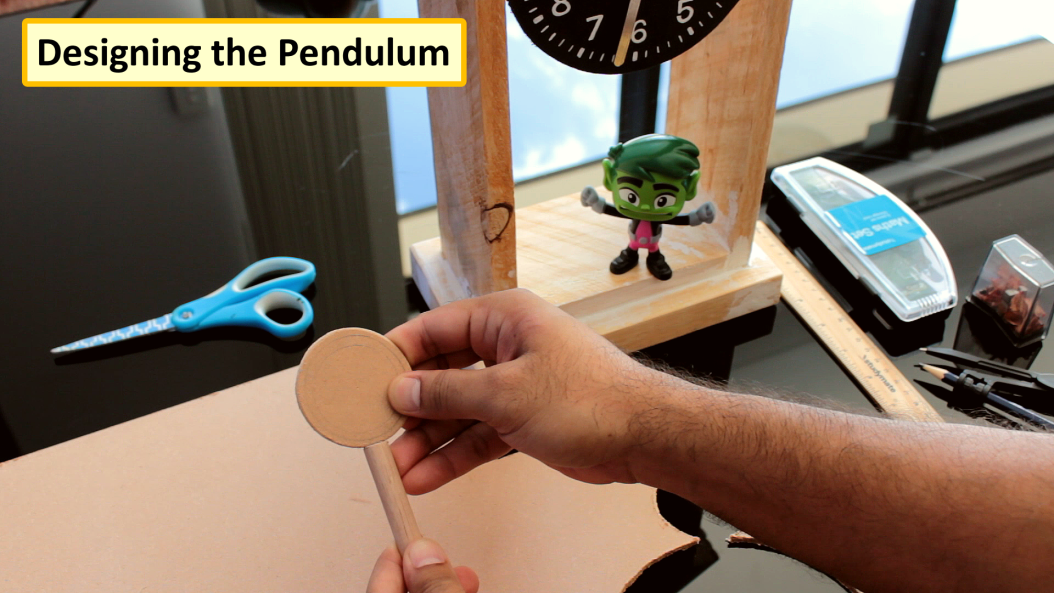
Circuit Diagram
----------------------

This is how I have created the pendulums circuit.
Connect the servo to any one of the digital pins of the Arduino. Then connect the -ve to GND and +ve to the 5V output of Arduino.
Finally connect the -ve wire of the battery to GND and +ve to the VIN pin of Arduino placing the switch in the middle of the circuit.
This circuit diagram is for the pendulum only.
The Code
--------------

The code is very simple.
Start by including the "Servo.h" library.
Then declare the servo pin.
And then, create a object of the Servo class.
In the "setup()" section attach the servo to the Arduino's pin.
And, finally in the "loop()" section we just need to move the servo left and right.
Components Assembly
---------------------------------

I will start by soldering the Arduino to the circuit plate.

Then, I am connecting the Servo to the digital Pin D2 and the -ve to GND and +ve to the 5V output of Arduino.

After that, I am connecting all the cables to the BMC and finally soldering it to the main circuit board.
Battery Installation
---------------------------

Now that we have the circuit ready, its time to hot-glue the Battery to the back of the clock.

Then, solder the circuit to the battery. Instead of using the battery you can connect a step down converter here.

A quick note: AVR are made for low power applications, as low as 0.7v . The nanos at <5v will work a little slower, analog pins will be glitchy and the 5v and 3v3 regulators will provide a lower voltage.
Painting
------------

Next I am painting the body of the clock. I chose off-white color for the body of my clock as my dial is black in color.
Preparing The Backplate
-----------------------------------


I created the back-plate from the remaining cardboard bit and screwed it to the back of the clock.
Installing the Pendulum and Clock Face
--------------------------------------------------------

Thats it, almost done.
To conclude the tutorial I am hot-gluing the pendulum to the servo motor and then sliding the clock face to hide the circuitry behind it.

While testing my pendulum I figured out that I need to decrees the angle as the pendulum was hitting the walls of the clock. Thats it, all done..
Thanks
----------
This is another beautiful creation of the wooden pallet that is recycled into an excellent piece of work.
Thanks again for checking my post. I hope it helps you. Stay home and stay safe.
If you want to support me subscribe to my YouTube Channel (https://www.youtube.com/user/tarantula3)
Video: https://youtu.be/CLa6n6jDqrU
BTC: 35ciN1Z49Y1bReX2U7Etd9hGPWzzzk8TzF
DOGE: DDe7Fws24zf7acZevoT8uERnmisiHwR5st
LTC: 3KVZTa2wqvYrEaB75qEEdQAv5sDLvCMS9j
ETH: 0x2CB4a1301aFCcfC7A6d50C7F2151F2B5a3BD40f6
Thanks, ca again in my next tutorial.


Wow, cool. I like that.
ReplyDeleteGreat information at Algodones Mexico Dentist
This comment has been removed by the author.
ReplyDeleteThank you for sharing a knowledge, and looking forward for more information like this.
ReplyDeleteCar Insurance Renewal Premium Calculator
Thanks for sharing the blog, seems to be interesting and informative too.
ReplyDeleteTop 10 Stock Brokers In India
Excellent blog!!!Keep posting...Max Bupa Health Insurance Company provides comprehensive health insurance plans to manage financial opportunities in medical emergencies. Click to know about the plans, key features, coverage and more.Max Bupa Health Insurance Review
ReplyDeleteAmazing article !! wisdom capital providesbest Demat Account does not hold money- it holds shares and other financial instruments digitally. Earlier, holding these financial instruments meant safekeeping paper certificates of each share. Now there is no need to do any paperwork while share trading. and How to find low brokerage and high exposure broker in india. zerodha review.
ReplyDeleteGreat share!
ReplyDeleteFind Best Stock Broker In India and comparison between discount brokers.
Very informative and interesting blog! thanks for sharing and keep sharing.
ReplyDeleteUnited India is a company known for its one of the Best Health Insurance Policy. The company has various liability and performance insurance policies against various medical threats.Policy renewal is done by the United India Insurance Online Payment portal visit us to know more about policy in detail.